Follow these instructions for a homemade caulk road
January 2, 2009
Following on from the previous post, once you’ve cut up your sheet styrene or whatever you will use for a base to put the caulk on, then prepare your work area and get everything ready.
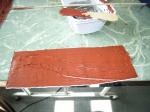
 Step 1: I’ve prepared my work space. I’ve got the caulk and caulk gun ready, plus a lid to screw onto the caulk gun in between applications to stop the caulk drying in the tube. I’ve also got ready a wooden ice cream stick to smear and smooth the caulk, plus a bamboo skewer as another tool, to make impressions in the caulk of things like tyre tracks (I tried yesterday using wheels left over from model kits, but the caulk adhered to them, resulting in the opposite of the desired effect!). My tools are resting on a plastic tub (needed for scraping unwanted caulk into).
 Step 2: apply the caulk to the section of road. For Leningrad roads during “Operation Barbarossa”, you want a convex shape.
 Step 3a: using the wooden ice cream stick (or whatever you use to spread and smear the caulk with), spread the caulk widthways.
 Step 3b: make sure you spread it equally onto both sides.
 Step 4: now smear and spread lengthways. This is where you’ll want to spend a good amount of time, making sure application is fairly even and still maintaining a convex shape. Your technique in spreading and smearing will improve with practice, too. Remember, everything is travelling lengthways along roads, so you can even begin to add detail like pot-holes, wash-outs and tyre tracks now if you wish.
 Step 5: really work on any details you want to have. If you click on the thumbnail and open up the photo here, you’ll see a pair of tyre tracks that have swerved from one lane to another and have left deep ruts in the road. When it comes to the painting and flocking stage, I’ll be using inks in washes to really help bring that bit of detailing out.
 Step 6: when you’ve finished, make sure you have a warm room so the caulk can begin curing/hardening/drying as soon as possible. The summer sun in this photo was keeping this room at a nice warm temperature (once I closed up the windows – watch out for fumes!) at the conclusion of today’s efforts.
You’ll note in Step 6 that you can see crossroads and T-intersections. I’ve put tyre tracks going through and also turning on these! Have variety in your pieces, though…you won’t want all your pieces to look like a whole Army or Division just went over them. Only three pieces ended up with pot-holes. I didn’t do any wash-outs…
Now to leave these for a week to fully harden.